January 05, 2006
Chocolates
Mignardise are small little sweets that you get at the end of a fancy meal. They are often an assortment that contains not only chocolates, but also other candies or cookies. This year I just made three quick chocolate based mignardise, and we passed them around with coffee.
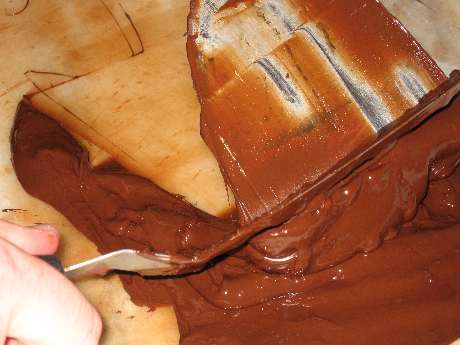
Tempering Chocolate via the "tabling" method
There's really only one trick to chocolates, and that's tempering the chocolate itself. It's certainly an odd process, and the first 3 or 4 times you do it, you really think it's not going to work. I like to use the "tabling" method pictured above, because the chocolate comes into temper very quickly, and remains smooth. If you don't have a flat surface (I have a marble board) you really can't table chocolate. It's also pretty messy no matter how careful you are. It's not very clear in the above picture, but I use a combination of an offset spatula and a drywall knife when I table the chocolate.
The most important thing, however, is to check that the chocolate actually is in temper by dipping something like the back of a spoon into it. If the chocolate is in temper, the spoon will set up very quickly (less than 5 minutes). If after 5 minutes, the chocolate is soft, you haven't lowered the temperature of your chocolate enough. For dark chocolate, anything above 88 degrees isn't yet in temper (85 for milk and 83 for white).
The first chocolate (not pictured) was white chocolate "bark" with finely diced nuts and dried fruit. It's pretty easy to make normally, you just thinly spread the tempered chocolate onto a Silpat, and then sprinkle the topping. You can score the chocolate once it starts to set, or you can simply break it into irregular shapes when completely cool.
I say "normally" because I was lazy and did not check the temper on my first batch. Of course, it was too hot and did not set properly. $8 of white chocolate into the trash because it already had fruit bits in it.
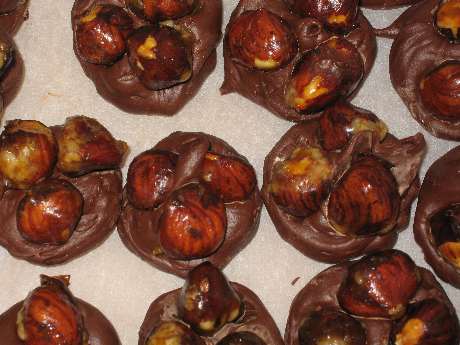
A Hazelnut Candy known as "Three Brothers"
This candy is easy to make if you can find ready made bars of gianduja (which I was able to). If you cannot, you have to grind the hazelnuts and chocolate together in a food processor. This isn't difficult, but it is quite hard on the food processors. At school we broke several because of the strain you put on the motor.
Once you have tabled the gianduja, you pipe it into rounds and top each with three hazelnuts that have been "draggeed" with sugar to both toast them and make them shiny.
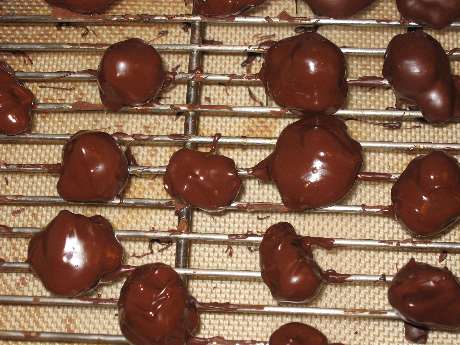
Truffles with a Coffee Flavored Center
Truffle centers are formed via a basic hard ganache, then dipped twice in tempered chocolate in order to form a nice hard shell. The first "dip" is actually easier to do with latex glove coated hands, and you really just need a "sealer coat". The 2nd actually does need to be properly dipped in order to look reasonably nice.
Lots of recipes will have you cool the centers in the fridge, but I was taught instead to table the center chocolate until it starts to set up, and then pipe the resulting mixture to make the truffles. This is messier, but much faster overall -- it takes two hours to cool the centers in the fridge.
I'll be the first to admit that I'm not the best chocolate maker when it comes to the final look. I really can't get my truffles into any kind of round shape even after rolling them in my hands. I just tell myself that they are supposed to look like the mushrooms anyway.
January 04, 2006
Dobos Tort
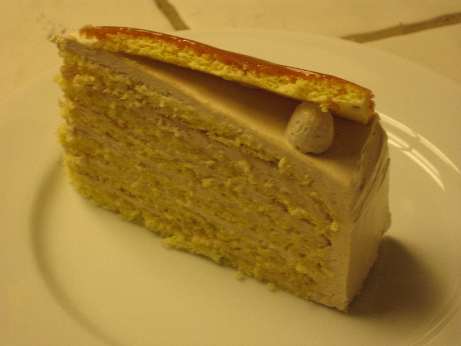
Dobos Slice
Dobos Tort is a nice cake. But it is a fair amount of work. It's a basic sponge cake with 6 layers, butter cream between each one, and a final layer on top that is coated with caramel prior to being cut into wedges and then afixed to the top with a dot of butter cream. Like with many cakes, the layers are moistened with a simple sugar during assembly. We used a bourbon flavored syrup this time, as it goes nice with the coffee in the buttercream.
The most interesting part of the Dobos Tort is how the sponge is made. It's a basic normal sponge made via the separated foam method (which means yolks and whites are processsed separately). However, the batter is spread directly into 7 circles, 10 inches each. This gets you nice and even layers, and you don't need to slice the cakes afterwards. It does, however, mean you need 7 half sized sheet pans for each cake, or you need to do them in two batches. My oven can just barely hold 4 pans at a time via some creative positioning.
The eggs attempted to escape
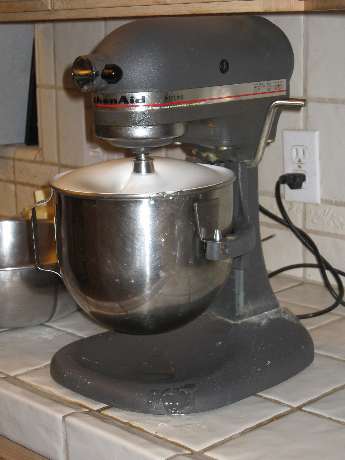
I make butter cream via the "swiss" method, which basically means making a meringue. The egg whites are whipped to soft peaks and then hot (242 degrees F) sugar syrup is poured in. The whites continue to whip until completely cool. Note that the quantity I was using just barely fit into my Kitchenaid.
Nope, it didn't go over the edge.
However, the butter needed to be whipped in via two batches. Then the resulting buttercream needed to be stirred together, and finally the coffee flavor (visible next to the butter below) added. This all would have been easier if I had a 12 quart Hobart. But no home cook in their right mind normally makes 5 pound batches of buttercream.
Coffee flavor is made by boiling down coffee and sugar until a very very thick syrup results. The sugar actually carmelizes, which is part of the flavor. You want very little water to remain so that you don't break the structure of the buttercream once you add it.
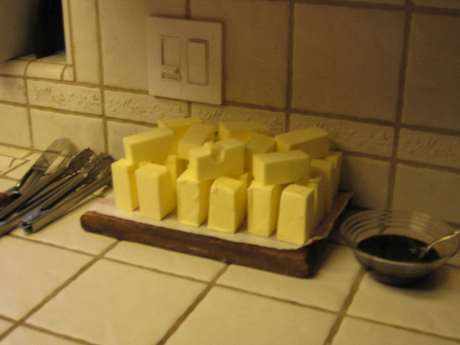
Butter-henge
3 pounds of butter. William. "Should I cut this up so it softens faster?" "Sure, that would be great."
Never leave your cooks alone without explict instructions, or you too shall have a stonehenge formed from butter. I think every single person with a camera photographed this. It was just too great not to.
January 03, 2006
Clafouti
Yet another great party idea. Clafouti are basically a baked souflee-like batter-based dessert. It's a fairly loose batter poured into a pan and then baked in a fairly hot oven. The result comes out not unlike "Dutch Baby" pancakes (sort of puffed up and brown). Usually some form of fruit is put into the pan before the batter. We made two kinds, a sour cherry (using jars of Morellos from Trader Joe's) and prunes re-hydrated in congac. Prunes are usually used in a very similar desert is known as a "far".
In addition to being quick to make when the time comes, it's a fairly unusual dessert for most Americans. It's always fun to serve something people haven't had a million times before.
I just did a google for a recipe for this one, and here's what we used as a base. As typical, we simplified this a bit, and just tossed all of the mis into the blender and whapped it up when the time came. We also used basic powdered sugar for the final dusting, which we placed into a little cheesecloth "bag" as part of our prep.
Clafouti/Far (9 inch pie pan, probably need to double for each)1/4 cup plus 1 tablespoon sugar
3/4 pound Italian prune plums, halved and pitted
3/4 cup milk
3/4 cup light cream
3/4 cup flour
2 eggs
1 egg yolk
1/8 teaspoon salt
1 teaspoon vanilla
Vanilla sugar, for sprinklingPreheat oven to 400 degrees and butter the pie plate well.
Sprinkle the pie plate with the 1 tablespoon sugar and distribute the plum halves
over the sugar, skin side down. In a blender blend the milk, light cream, flour,
eggs, egg yolk and salt for 2 minutes. Add the 1/4 cup sugar and the vanilla, blend
the mixture for a few seconds and pour it over the plums. Bake the clafouti in the
middle of the oven for about 30 minutes or until puffed and golden. Dust the clafouti
with vanilla sugar and serve at once.
January 02, 2006
Fruit Tarts

Fruit Tarts, Clafouti, Dobos Tort (back to front)
I almost alway serve fruit tarts at these parties. They are easy to make, look great, and I'm partial to this sort of dessert myself after a heavy meal.
I tried out a new method of blind baking the crusts, which is to let the dough hang over the edges, bake without any extra pie weights, cool, and then trim the top with a knife. It works well, provided the dough isn't too soft, the tart pans not too high at the rim, and that you leave plenty of dough hanging over the edges. The cooked scraps also make a nice snack.
This was sort of a silly experiment to do on the day of the party, because had the crusts come out badly I would have needed to run up another batch of dough. But the dessert work was done early in the day, and crusts are pretty much second nature at this point.

Derrick and meriko filling tarts
While pastry cream is common as a filling for fruit tarts, I often find it to be too heavy. I cut it 50/50 with whipped cream to provide a lighter texture and less of a pasty mouth feel. Technically this is known as "diplomat cream". Before applying the cream, a thin layer of apricot glaze is put down to help seal the bottom. This keeps the pastry cream mixture from causing the crust to become mushy.